Sunday, July 28, 2013

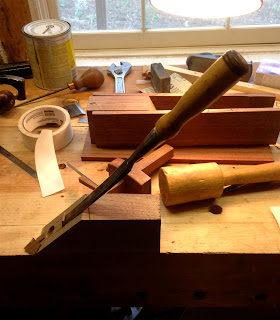
Making a Copy of a 1929 Santos Hernandez Guitar, Old Brown Glue--or, Sometimes You Just Gotta Glue Something Together!

copy |ˈkäpē|
noun ( pl. copies)
a thing made to be similar or identical to another : the problem is telling which is the original document and which the copy.

replica |ˈreplikə|
noun
an exact copy or model of something, esp. one on a smaller scale : a replica of the Empire State Building.
a duplicate of an original artistic work.

verb (copies, copied) [ trans. ]
make a similar or identical version of; reproduce.


A couple of years ago, I ran across a classical guitar maker's blog or a guitar makers' forum that discussed the topic of "replica" versus "copy". One maker said that he doesn't make replica's, because it is impossible to make a true replica of a famous luthier's guitar. I agree, because any guitar I make will sound like I made it, no matter how true I try to stay to the original it won't sound like a guitar made by the great Santos Hernandez. I hope, however, the guitar will sound close to what Santos wanted it to sound like.

Did you notice that the only difference between "copy" and "replica" is the word "artistic"?


The other day I took the plunge and started making a copy of a 1929 Santos Hernandez guitar, not a replica, but a copy because I don't have access to the original Santos Hernandez guitar.

I cut the head stock from the neck blank (click here to see that posting) and made the scarf joint. I glued the joint together with W. Patrick Edward's Old Brown Glue, since he was kind enough to send me a free bottle of the glue for me to try again. Everything went well.


Then I really got crazy! I edge jointed this Sitka spruce top, with just the right amount of bear claw, that I've had in my wood cache for the last five years or so and I have been dying to make a guitar with it! I used Old Brown Glue to glue the two pieces together. It's holding together and it should.

I will admit that I just ordered a brass glue pot from Hank Levin at MusiCaravan because I make hide glue to use when I glue the bracing on to the guitar top. I ordered the pot because I am tired of using a hot pot that isn't that controllable and I find the other glue pots that are available from LMII, Stew-Mac and Tools For Woodworking a little too ugly to grace a studio. As Hank Levin says, he was "esthetically and financially repelled by electric glue pots"!

I also downloaded two little booklets on using hide glue from Toolemera Press, The Glue Handbook: The Keystone Glue Co. c1930 and
Doing The Gluing: The Keystone Glue Co. c1930
, the type face print of the original is a little fuzzy, but it looks like there is a lot of great information to be had! When you go to Toolemera's website don't forget to download Charles Hayward's sweet little book, How to Make Woodwork Tools! You gotta love a book that has a chapter on "Eleven Handy Tools" and a "Home Made Smoothing Plane" made from a single block of wood to look like a Spiers smoothing plane.

Remember, get out into the shop and make something!


Saturday, July 27, 2013

Rocky Mountain Mammoth Mine, Boulder County, Colorado--Restoration Work on the Cabin

In the words of the Historic Preservation Act of 1966, the founding document of contemporary preservation practice, 'the spirit and direction of the Nation are founded upon and reflected in its historic past'. Yet the historic past is intangible and ephemeral. It may be no accident that the origins of history museums and historic preservation in the United States coincided with the growth of the consumer society.

Dell Upton, Architecture in the United States, 1998


The past several afternoons thunderstorms shut down my work on the 1898 cabin at the Rocky Mountain Mammoth Mine. Lightning has hit too close for comfort and the heavens poured down buckets of rain.

The north elevation of the cabin

Fortunately it thunderstormed for only an hour allowing Brian and I to start replacing the original siding back onto the 1930's addition of the cabin. The addition is now supported with 8x8 timbers for sills and new floor joists were installed to carry the original flooring. I wish that I didn't have to use "dutchmans" to replace the lower have of the siding boards, but the original owners installed a cement skirting around the original sill timbers with the idea of holding the building up. All it did was keep in the moisture and rotted the ends of the boards and the original sills. If they hadn't off done that I wouldn't have this wonderful restoration job!


The west elevation

We got around the corner, there is more work to do on Tuesday!


A moth on the porch of the cabin.


A bird kissed this funnel with one of its wings!

My plan is to complete work on the 1930's addition before I tackle the original 1898 cabin and the building's roof!

Sunday, July 21, 2013

Krenov Style Hand Plane, Part 5: Glueing on the Sole and Success!

Do or do not. There is no try.

Yoda


I misspoke on my last posting, this is my 200th post! I don't know if I should be excited or not! I will say it is appropriate that I talk about a success, my Krenov style hand plane does work.


I used a mortise chisel to cut out the mouth opening on the sole.


The chisel made fast work of the opening.


I decided that it would be better to index the sole to the plane with screws instead of dowels. As I mentioned in an early posting, the dowel I used was a little smaller than the drill bit!


As per directions, I ramped the mouth with a chisel using the center cut out for a guide. I used double sided carpet tape to keep the wedge in place, everyone should have double sided carpet tape in their shop, I use it all the time!


The sole is glued on!


I used a drawknife and a spoke shave to do some basic shaping of the plane body, no bandsaw needed! I spent about 2 hours finessing the mouth opening and trying to flatten the sole. For some reason, I had difficulties in truly flattening the sole on my plate glass sanding board, I would remove too much from the toe of the sole. I applied downward pressure several different ways to correct for that, I ended up using a scraper to hollow out areas of the sole. That allowed the sole to sit flat on the sanding board.


As you can see, I got the plane to work, though I need to tweak it some more and properly sharpen the plane iron.

I have made smaller planes, including little tiny thumb planes, using Irving Sloane's construction method, which can be found in Steel String Guitar Construction, and making a Krenov style plane is no different. You must have a flat bed for the plane iron, the plane's sole must be flat and the mouth must have the proper opening.

If you make this plane from Finck's book, I recommend that you make the brass plane hammer right after you have glued on the plane's sides. Having that hammer to adjust the plane iron sure is handy, I used my fret hammer, which I shouldn't have because it is only for installing frets, so I will either make a hammer or buy one from Lee Valley.

I ordered three plane irons with chip breakers from Hock Tools, they were three and one half inches long and I used one of them to make this plane. I am going to contact Hock Tools to see if I can exchange the other two blades for four and one half inch long blades. In making this plane, I discovered that I am more old fashioned than I thought, I want to see some steel sticking up above the plane body. If you look at that famous cocobolo smoothing plane that Krenov made, you will see that he used a standard block plane iron. I measured the length of the iron from my Stanley No. 60 and 1/2 low angle plane and found it is just over four and one quarter inches long. I really like the looks of that little plane and would like to make a close copy of it. Someday.

Anyway.

The plane is completed and now I need to turn my attention to French polish work on several guitars.


To conclude, all I will say is

"Get out to the shop and making something! Stop surfing the internet and get busy!"


Wednesday, July 17, 2013

Krenov Style Hand Plane, Part 4: Glue Up

...tools are essential; their grace and deliberateness make your hand reach out to them--lightning rods to ground the creative spirit.

Roy Underhill, The Woodwright's Shop, 1981


This past Monday I took time out from running errands so I could work on the Krenov style hand plane, I couldn't just let it sit. As you can see, it was a very humid day for this part of Colorado! I had to build a fire in the fireplace that night to take out some of the humidity!

Before I begin describing the photos, I want to say that this is not a tutorial on how to make a Krenov style handplane, there are many websites and weblogs that are very detailed and quite good about this kind of project. I never wanted this blog to be a "how-to", it is simply a blog about what I do.


I drilled the holes for the indexing screws with a drill press and discovered that the dowel was smaller than the hole. Next time I think I will use screws to index the sides and center blocks!


Laying out for the cross pin hole.


I set my marking gauge so I could duplicate the height of the cross pin on the opposite cheek. It's quick and easy, a trick I learned as a carpenter!


I carved the pins with my sloyd knife.


The cross pin all carved and finished! Boy, I spent some time getting this thing right! I had to plane and sand it so it was the proper distance from the center block.


Applying the glue. Yeah, I know it is not as neatly done as Finick does in his book, but I am trying to make this plane rather quickly without losing the point of the project in all the details of making it!


The clamps are applied!

The next post will be about glueing on the sole and fitting the mouth to the blade, I am looking forward to that!


This where I got to work today, Walker Ranch Open Space.


Since I can't get to my studio as much as I would like to, I still have to remind myself why I work with wood, so here are some videos that I hope make your day a little brighter. These guitars are the romance of wood working, why I hold onto hand tools, tools to make a tool that really sings!


Sunday, July 14, 2013

Krenov-Style Hand Plane, Part 3: You Can Use Hand Tools to Make a Plane!

My first suggestion would be to ask yourself, "Am I doing this out of curiosity, or do I believe in it? Do I intend to arrive at the point where this becomes the thing for me, and I know I can make a wooden plane anytime I want to and I can do fine things with it?" If it's mere curiosity, then it becomes just like anything else we do for the sake of exercise. Just to prove that we can go through the ABC's of it.

James Krenov, Making Music with a Plane, Fine Woodworking #126


I believe in wooden hand planes, I always have, but I also believe you can make a plane with the tools that you have on hand, if you have the desire, or the need to make one.

What Krenov says in his statement is true for anything that you do in life. You must believe in it, you must have a passion for it. Otherwise, there is no point in doing it. I say this to people who tell me that they want to make a guitar, and yet they still haven't held a plane, knife or chisel in their hands, nor do they have any interest in doing the work. They like the idea of making a guitar. You must be willing to do the work, that is where the magic exists. I know this sounds sappy, but to work is to pray.


I drilled out a hole yesterday and this afternoon I chiseled out the slot for the screw on the chip breaker. It was pretty quick work.


I scored the edges of the channel with a shop made cutting gauge. Nothing fancy here.


The blade with chip breaker fits nicely in the channel.


The completed channel.


The plane blank is ready to receive the indexing dowels, then I can layout for the cross pin.


This morning I Googled for images of guitars made by the great Spanish luthier, Santos Hernandez, to remind myself what it is that I do--I make guitars. I am making this plane to see if I want to solely use wooden planes to help me create guitars, to add another layer of romance to a craft that, for me, is steeped in romance. I am not a tool maker, but a wood worker who occasionally makes my own tools to help me progress in my craft.

Okay, off my soap box!


Here is a YouTube of Scott Tennant playing on some magnificent guitars! These guitars are why I had to study the classical guitar!


Saturday, July 13, 2013

Krenov Style Hand Plane, Part 2: Who Says You Need An Electric Router To Make One?

Old World planes, made as much to look at as to do a job, often had inscriptions and floral carving. But the completely utilitarian American plane, except for an occasional graceful handle, usually resembled a box.

Eric Sloane, A Museum of American Tools, 1964


Today, I took the plunge and started cutting out parts for a 9/10/11 inch long Krenov-style plane. I used my trusty DeWalt contractor's saw with a rip blade to rip the piece of walnut down and then it was to the Bosch sliding compound miter saw to cut the angles. Then I used a Stanley No. 4 smoothing plane to make the saw blade marks disappear, everything fits together well, though I will tweak everything on a large sanding board. In this photo I am using my Stanley brace with a 3/4 inch Irwin bit to drill out the end of the slot for the chip breaker nut. I plane one chiseling out the slot tomorrow with a Pexto 3/4 inch chisel.


A close up of drill bit and wood.


Parts cut and set out in order of assembly. I am using a 3/8 inch thick piece (as per instructions in The Fine Art of Cabinet Making) of bubinga for the sole. I figure that it will add a little weight to the finished product.


The blade in place to give me a better idea of the work ahead.

I like Finck's book, Making and Mastering Wood Planes, especially if you have never made a plane (or anything else made out of wood) before, but if you have the skills and knowledge of putting a project together, I think you would be better off following Maestro Krenov's instructions that he gives in The Fine Art of Cabinet Making.

If you want to make this "box" that is a plane, just go ahead and do it! And for crying out loud, don't make it from a kit! Sorry, Mr. Hock!

Thursday, July 11, 2013

Krenov Style Hand Planes

One does not tune a Stradivari with a monkey wrench.

James Krenov


I'm waiting for the humidity to drop a little more before starting on my next guitar, which I think will have the shape and size of Antonio Torres' FE 19, with an Engelmann spruce top and California laurel back and sides. While waiting, I thought I would take the chance to make a few planes in the Krenov style. I think I must be the only hand tool wood worker who hasn't made any of these, though I have contemplated making a few over the last 20 years or so. It was all this gibberish about needing a bandsaw, boring machine and 8 inch floor jointer to make such a plane that kept me from it. I know that my skills are good enough now that I will do most of the work by hand. Okay, I will use my Dewalt contractor saw, Bosch sliding compound miter saw and Delta bench top drill press for more accuracy, but I swear I will remove saw marks with a hand plane and cut out the final shape with a shop made bow saw!

I received 3 Hock Tool blades today, along with Dave Finck's book (it's almost a little too detailed in planemaking, but I recommend it!) and I finally was able to replace my paper back copy of Krenov's The Fine Art of Cabinetmaking, with a hard back copy printed by Van Nostrand Reinhold Company.


I found some nice heavy black walnut at a local flea market, I will put a bubinga sole on the planes I make because I have some on hand.


My trusty Stanley No.5, Type 11 jack plane resting on a blank that is nicely squared. I think I will make an eleven inch smoothing plane from this piece of walnut and an eighteen inch jointer from the large piece. I really want to make the scraper plane that Finck shows towards the end of his book, Making and Mastering Wood Planes. I think that such a plane would be great for the final thinning of guitar sides!

Remember, Hand Tools Rule the School!

Sunday, July 7, 2013

A Visit With Tico Vogt

Man has an affinity for wood.

Alex W. Bealer, Old Ways of Working Wood, 1980


Tico showing off his Brese Planes T-shirt!

A month ago my wife and I were honored with a visit from Tico Vogt ! Tico is a one of the most wonderful people I have ever met and he just happens to be a great wood worker!

Tico first left a comment on my blog four years ago asking me if we Westerners really do burn pine for fire wood. I told him that most of us do because conifers are far more prevalent than hardwoods here in the West. Since that first comment Tico has always sent me an encouraging comment about whatever I am working on at the moment. I have discovered that he encourages many other bloggers in their endeavors.

Tico drove up to our house from Boulder, Colorado, where he, his wife and daughter were visiting his son who lives in Boulder. Tico had written to me before that whenever he was in Boulder he was going to see me and my workshop. So he did! He was a little late getting to our place, he said he stopped four times will driving up the St. Vrain canyon to take pictures. It is a beautiful drive!

Amanda, I and Tico talked about so many things during his visit that I can't remember them all, I do remember that we talked about how beautiful it is here in this part of Colorado; where to go hiking around; Ron Brese's new plane, the Big Brute, that he made especially to be used with Tico's Superchute; the best trees for firewood; his family and home; our family and home; and of course, woodworking.


Tico really wanted to see my workshop, what woodworker doesn't want a peek in somebody else's shop, and like most people who see it he was impressed that my wife lets me have it inside our house. I don't use power tools to make a guitar, so she allows me to stay. Here in this photo, I am showing Tico some redwood tops that I had just received from Luthiers Mercantile Inc in Healdsburg, California. After looking around the shop he asked me where my clamps were. I pointed to the dozen and a half hanging on the wall. "Wow, you don't have any clamps!" he exclaimed, "I have so many and I rely upon them a great deal". I told him that's the beauty of being a guitar maker, you don't need too many clamps!


In this photo I am showing him a guitar I made with a Douglas fir top and mahogany back and sides. I think we were talking about finishes and french polishing.


Tico thought I did a great job French polishing Julia's 1933 Santos Hernandez guitar. I mentioned that I wanted to do about three more sessions, he thought I was a little silly to keep going. He was right.


"This is quite the box, you got here, Wilson! This is a wonderful guitar! It is well balanced with a nice separation of notes." That is what he said after he played guitar #5 for awhile. Tico is quite a good player, I must say. He has a solid technique both right and left hand and I was quite impressed on how well he sits while holding a guitar. I taught classical guitar twenty years ago, he would have been a fun student for me back then! When I mentioned that he held the guitar well, he said that he had back problems and that the book, The Natural Classical Guitar, by Lee Ryan, helped him immensely.


What a visit! Unfortunately it ended all too soon and Tico drove back to Boulder and the cabin they had rented at Chautauqua. Amanda and I have a standing invitation to visit Tico and his workshop outside of Saratoga, New York, we can't wait to go and see him!

The internet and blogging can be a wonderful thing, because of this little thread in cyberspace I was able to meet a wonderful person. I urge other bloggers to follow Tico's example by getting out and personally meeting other wood workers, musicians, artists, anyone that you correspond with via the internet.


Monday, July 1, 2013

Sometimes You Just Gotta Plane a Piece of Wood

Leveling was called "trying" and "trueing"...


Eric Sloane, A Museum of Early American Tools, 1964


I really want to get started building a guitar based on Antonio Torres's FE19 guitar, the wood is already thicknessed and the neck is carved, all I need is the time to put it together. All I need is the time. Life and the day job keep me busy, and then this holiday week is our fifteenth wedding anniversary, that will keep me busy. Plus, there have been a lot of thunderstorms here lately and since my shop isn't climate controlled the humidity (according to my really cheap hygrometer) is at 54 percent! A little too humid to be assembling guitars.


This afternoon I pulled out a Spanish cedar neck blank and sized the main shaft down to 20mm in thickness. The remainder of the piece I thinned down to 22mm, it will get cut into smaller blocks to be glued up for the heel block.


It feels good just to plane a piece of wood.

1912 Ex-Segovia Cedar/East Indian Rosewood Classical Guitar

Inspired by Andrés Segovia’s famous 1912 Manuel Ramirez guitar, I chose Western red cedar top and East Indian rosewood back and sides from m...