Skip to main content
Search
Search This Blog
Wilson Burnham Guitars
Made in Taos, New Mexico
Pages
About Me
Guitars Currently Available
Guitars Currently Available at Savage Classical Guitars
Early Romantic Guitars Currently Available
Custom Grand Concert Model
Philosophy
What People Are Saying About My Guitars
My YouTube Channel
8 String "Brahms" or “Cello” Guitar
Seven String Classical Guitar
Capos/Cejillas for Sale
More…
Posts
Showing posts from 2014
Show all
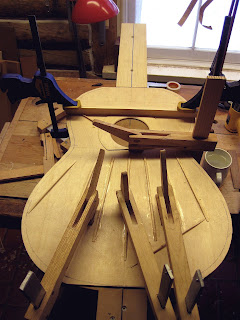
December 31, 2014
Making an Antonio Torres Style Guitar: Top Bracing, Attaching Top to Neck and Bending Sides by Hand
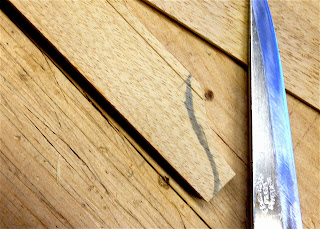
December 24, 2014
My Chair Maker's Bottoming Iron
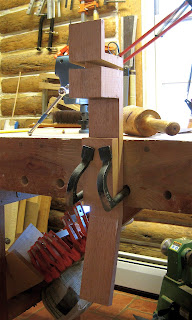
December 22, 2014
How I Made an Eight Inch English Layout Square
December 16, 2014
On Being Vise-less, Paring Chisels and Carving Guitar Necks
November 17, 2014
Disston Rip Saw, Stanley Scrub Plane, Douglas Fir Guitar Top
November 17, 2014
How to Make a Box Sing, Part 2
November 11, 2014
How to Make a Box Sing
November 11, 2014
1860's Greek Revival House: My Work Is Done!
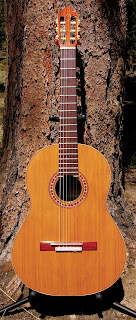
November 03, 2014
Hernandez y Aguado Style Guitar - Douglas Fir Top, Mahogany Back and Sides
October 27, 2014
The Best Wood, Part 2
October 20, 2014
Wooden Straight Edges
October 18, 2014
Advice for an Aspiring Classical Guitar Maker
Newer Posts
Older Posts
Home