We are not in an age of folklore, but be it superstition or science, the results have certainly been interesting: the New England Farmer says, "The moon has potential influence in the various parts of her orbits, that by cutting one tree three hours before the new moon and another of the same kind of tree six hours afterwards, a difference in the soundness of the timber will be noticed." "When the moon is new to full," reads an old almanac proverb, "timbers fibers warp and pull." There were rules even for cutting firewood, for an entry for January 6, 1799, in an early Almanac advises, "At this quarter of the moon, cut fire wood to prevent it from snapping and throwing embers beyond the hearth."
Eric Sloane, American Barns and Covered Bridges, 1954
For end the year I have to give a warm and hearty Thank You! to Luke Townsley of unpluggedshop.com for picking up my blog. Luke, may you never grow tired of my blog! I hope to always post something that will interest you and hopefully, help you learn something new! Thanks to his site my blog has gotten over 19,000 hits in the last six months! I had been blogging for 4 years before this and had only received 640 hits! Thank you, Luke, because of your work I have gotten to meet such great folks as Terry Kelly, Tico Vogt, among others, and all the people who have viewed my blog. This December, Robin Wood, that wonderful English bowl turner extraordinaire, also discovered my blog. I believe that he has single-handedly revived the art of bowl turning on a spring pole lathe world wide. Thanks to all of you!
It was a touching year, my wife and I moved from my ancestral home in northeastern California back to her ancestral home land of gold, Gilpin and Boulder counties Colorado. There are many people who are gone and still loved that I would like to talk to again to make sure that everything that I am doing is "correct and proper" because they were the ones who taught me in the first place.
Wood working is a very personal act and any part of creating is, but remember, always look over your shoulder because somebody is looking, there is always an audience and you must strive to always to do your best.
I have 2 guitars that I will be building this year and I am already worried about who will play them and what kinds of music will be played on these guitars. I know the sounds, richness, fullness, depth and clarity that I want these guitars to create, I want them to express the music of Llobet, Smith-Brindle, Tansman, Thea Musgrave, de Visee and Dowland with all the nuisances a performer can get out of them.
Don't comprise quality, fellow woodworkers and don't be slaves to copying James Krenov or Dave Ellsworth! Robin Wood, Tico Vogt and Terry Kelly have it right, take the work that was done before us, honor that work by equaling or exceeding their work!
Terry, this emblem of the Red River Lumber Company is for you, this is what Paul Bunyan really looked like, Everett Jackson (The Marvelous Adventures of Paul Bunyan, Louis Untermeyer) was close with his illustrations but Paul really did have facial hair. Though Paul may have started the destruction of the old growth forests of the United States, because of him and my grandfather's hand tools I started wood working, I also gained a love of trees and what can be created from them. We are not the first people to love and know trees, our Bronze age ancesters knew what wood made the best bows and arrows, knife hafts and living structures.
Fifteen years ago or so, a good friend of mine, Andrea Gunderson, reminded me that winter is the time to come to one's self to regroup and become quiet in thought, like the trees and rocks around us that embrace winter with the eternal knowledge that spring, and new growth, always return, life is revitalized and with it new thoughts and acts of creation.
Here's to a happy, wonderful and productive New Year!
Thanks everyone!
Wilson
Saturday, December 31, 2011
Thursday, December 29, 2011
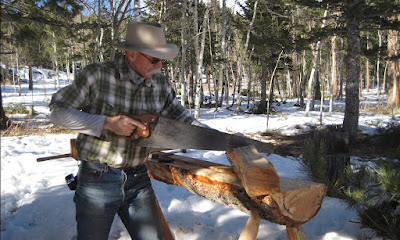
My Grandfather was Paul Bunyan
Nobody asked them about Paul Bunyan, for no one outside of a lumber camp had even heard of the hero until 1910. And the early woodsmen did not write their stories down. They told them, though, and so Paul Bunyan's fame spread far and wide.
Daniel Hoffman, Paul Bunyan, Last of the Frontier Demigods, 1983
Rufus Wilson, top of spar at the Gerber Sawmill, Mineral, California, circa 1925.
"My grandfather was Paul Bunyan" I know is a big claim to make, but from the stories that I heard about him when I was young sure enough made him sound like Paul Bunyan. He was Rufus Wilson, a logger, shake maker, blacksmith, saw sharpener, barber, house carpenter, well digger and I am sure that I am forgetting some of the things that he did. He was one of the last of the old time fallers in northeastern California, one of those men who felled huge ponderosas, Douglas firs and sugar pines with a double bit axe, crosscut saw and a bunch of falling wedges. My great Uncle Frank told me that "Rufe" could buck, by himself, a section of a four foot through sugar pine with a crosscut saw in under fifteen minutes. That when he was young, "Pop", as my mother and her siblings called him, never climbed through a fence, he always jumped them and that he willingly took the extra pay to climb and top spar trees in logging operations. I think I also heard that he was one of those guys who could jump up high enough, flat-footed from the floor, and flip in the air so as to drive the caulks, "corks", of his logging boots into the ceiling.
from left: Bill Glines; Martin Black on horseback; Billy Glines (Bill's son) leaning against horse; May Black Wilson (my grandmother), Rufus Wilson. Lyman Springs, California, circa 1910.
He wasn't a big man, I was told that he was no taller then 5'10". Frank told another story about the two of them deer hunting and my grandfather shot a 150lb blacktail buck way down at the bottom of Battle Creek Canyon. Frank said that they gutted the deer some and that grandpa then proceeded to "Indian" carry the buck the 15 miles back to Lyonsville. Frank said he had a hard time keeping up with him and all he had to do was carry the rifles!
Rufus married my grandmother, May Black, in 1910, she was just as tough as my grandpa, she bore him 11 children and took care of them all. She was a virtuoso on the piano and organ, everyone told me that she was a wonderful singer and that "her voice could raise the roof". Martin, the buckaroo in the photo, was Grandma's older brother. There are stories about him, too, I guess he made money as a bootlegger and ran a speakeasy during Prohibition.
Steam donkey near Lyonsville, California. Ollie Wilson at right of photo, other man is unknown. Date unknown
All the Wilson boys, Jerry, Rufus, Ollie, Tod and John were loggers and at some point in their lives had worked at the New Champion Mill in old Lyonsville. John owned a little sawmill down below Lyman Springs and I think Ollie ran one for awhile too. Ollie was a bootlegger, too, a story I heard was that he had his lumber wagon fixed up with a secret compartment to cache the liquor and once a month drove a load down the Hog's Back road to Red Bluff. About half way down to Red Bluff Ollie would meet the sheriff who would ask for some "lumber". My grandfather was heard to say about his brother Ollie, "You never see a bead of sweat on his brow or a callous on his hand, yet he makes more money in a month then I will in a lifetime." I wish that I had some photos of those boys falling trees. (When you grow up with loggers, the verb "to fell" doesn't get used a whole lot. You "fall" a tree and it "fell" in the right direction. I never heard anyone say, "Well, I'm going to fell that incense cedar today." "Fell", I suspect was too clumsy of a word to say.)
An early drawing of Paul Bunyan. Drawn by W.B. Laughead of the Red River Lumber Company.
Making those froe mallets and using the froes the other day set me to thinking about all the people I knew growing up in northeastern California and then Terry at CT Kelly Furniture had to mention Paul Bunyan to me the other day in an email. I felt that I needed to talk a little bit about the giants in my life and Paul Bunyan, too. I grew up not too far from Westwood, California where Paul Bunyan first took life in folklore writing (I know MacGillivray's poem was first) under W.B. Laughead's hand and I understand that there is a new book out on Paul Bunyan by Michael Edmonds, Out of the Northwoods: The Many Lives of Paul Bunyan. It sounds like an interesting read.
For those of you who love the history of logging, sawmills and conservation please check out the blog of the Forest History Society, Peeling Back the Bark. There is a lot of good stuff on there!
Tuesday, December 27, 2011
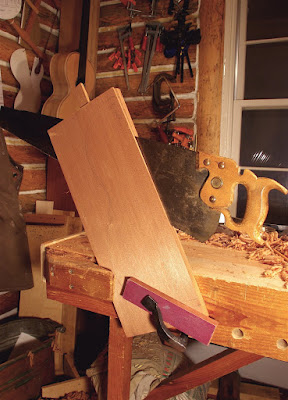
Reclaimed Redwood Guitar Top and 2 Panel Saws
American soil and American spirit have created Paul Bunyan. His forerunners are heroes who fed on fable and thrived on exaggeration: Hercules and Gargantua and Gulliver. Bunyan is not only more humorous but more high-hearted than any of his predecessors. He was born in the days when the forests of the Northwest were dark and immense, and the men who lived in them were few and lonely. The trees dwarfed the men; the men had to make themselves big, if only in imagination.
Louis Untermeyer, The Wonderful Adventures of Paul Bunyan, 1945
I'm waiting for the bread to rise, thought I'd practice writing a bit.
I have 2 guitars that I want to get started: one will have a spruce top with California laurel back and sides and will be a loose copy of guitar FE 19 by Antonio de Torres; the other will have a reclaimed redwood top with Indian rosewood back and sides, I hope to make this one a very close pastiche of an early 1960's Hernandez y Aguado guitar. Now is the time to start, the humidity is low in my studio.
This redwood board was saved from a picnic bench. I couldn't let it sit out in the elements anymore, the board has almost perfect vertical grain and rang like a bell when I first tapped it with my knuckles. It is similar to a redwood top set that I re-sawed from an old redwood water tank, the wood is something to behold! It had been so long since I re-sawed anything, I had almost forgotten what to do!
Here are the two tops together. I bought the Englemann spruce top about 10 years ago, it has a great tap tone and some very light bear claw. I should post photos of the rosettes that I am going to use, they were made in Russia and I purchased them through LMI. I look forward to building these guitars side by side, it'll be interesting to hear the differences in the tone woods when I finish them.
A close up of the two tops.
This neck is being made from some Spanish cedar (cedrus species) that I bought from Marc Culbertson at Gilmer Wood a little over 5 years ago. At the time of purchase Marc told me that the company had bought this cedar from a newly retired pattern maker who had had this wood for over forty years. It is marvelous stuff! This is for the redwood guitar.
The neck staff is a little too narrow for my comfort in cutting out the peg head, so I added 2 little "ears" to the head blank. As you can see I am copying even the crest that Hernandez y Aguado used on their guitars. I think I will skip texturing the field of the peg head like many of the H y A's where, I did some looking on the internet and found some H y A guitars that had peg heads that weren't textured.
For you tool geeks here is another project I have in mind. I was ripping down brace wood stock for the 2 guitars the other day and I was wishing that I had a shorter panel rip saw instead of the gorgeously large No. 7 Disston rip saw that is my "go to" rip saw. I've 2 other panels saws that are crosscut, but I lack a rip one. Then I remembered these 2 saws hiding out in my other tool chest. So, tomorrow I will drive the Jeep to a nearby wood store and look for some wood for proper handles. (I tried to put the saw nuts back in my grandfather's saw, now they don't fit!)
The saw with the handle is an 10 point 20 inch panel saw, the saw nut states "Warranted Superior" and you can just barely make out the same on the saw etch, the etch is very faded. The saw belonged to my maternal grandfather, he made a handle for it out of black (red) oak, [quercus kellogii] that is indigenous to northeast California. I have no idea how old the saw is. The saw without the handle I made by cutting down an old Disston, I think it might have been a No.7 or a D-7, but the etch is so faded I can't really read anything other then Disston. I think I bought that saw 15 years ago with the intent to make it a mate to the other saw, but to make it an 8 point rip saw. I do remember working on it, reshaping the teeth to rip configuration, I did about 1/4 of the teeth then quit. I must have gotten frustrated. As if I don't have enough projects all ready!
Thursday, December 22, 2011
Springpole Lathe, Snow and the First Day of Winter
Once again we are in the grip of that grim old gentleman familiarly known as Jack Frost. He is no effete degenerate, but is forceful, lusty, strong and energetic, yet he is not unkind to those who fear not to meet him face to face in his boisterous play.
Daniel Carter Beard, The Field and Forest Handy Book, 1906
Seventeen inches of champagne snow by 9am, my wife told me that Evergreen, Colorado got two feet of snow. It's warmed up to 14 degrees F, supposed to be a low of 2 degrees F tonight.
The dogs wanted to go for a walk as usual, the snow sloughed off the rocks at the narrow part of the gulch and was up to my hips.
At this point the dogs wanted me to break trail. Pete, the Kelpie, the littlest dog of the bunch, had been doing most of the trail breaking.
The lathe awaits another day.
Today is a day to be inside drinking hot chocolate or some nice whiskey. My wife is buying some sleds tomorrow before she comes home, there is a spot behind our house that is perfect for a sled run! Thank goodness for Christmas snow!
Tuesday, December 20, 2011
How to Make a Traditional Froe Mallet
What holds the Holy of the Holies, what did Brahma become? Wood. Why will aspen always tremble? For the nails driven into the cross. What makes the color of wood? The soil it tastes. Cradle, fiddle, coffin, bed: wood is a column of earth made ambitious by light, and made of beauty by the rain.
Kim R. Stafford, Having Everything Right, 1986.
Rive, verb, to split
Shake, noun, a split in a piece wood. (Heart shake, ring shake)
Shake, verb, (Middle English), to split.
I know I should have been in the studio working on my back log of guitars, but the day was so nice and warm with a tall blue canopy, I couldn't stay inside. I decided that I needed to make a proper froe mallet. This style of mallet is traditional to northeastern California, primarily Tehama (where I'm from), Butte, Shasta and Plumas counties where making shingles by hand from sugar pines was an industry. I don't know if it was used in any other region along the Pacific Rim, other parts of the United States or even other counties in California. I haven't had a chance to research this style of mallet more extensively.
This is a copy of a froe mallet that my great grandfather, John Wilson, made around 1900 and is in my brother's tool collection. It's surprising that we have it, these mallets were disposable, they wear out quickly when you rive out a thousand or so shingles a day, and were often made on site. When I was splitting off the cheeks of the legs of the poppits for the lathe, I was wanting a proper mallet to strike the froe with, so here is the process. Tools needed: a crosscut saw, axe and a knife.
First, find a nice young Douglas fir tree that is about six to seven inches in diameter, preferably a dead standing tree with no splits in it. Douglas fir was the preferred wood, it is a hard conifer, it's sectional density is .92, and is quite a bit lighter then foothill live oak which, by the way, makes wonderful mallets. Cut out a section between the branch whorls, a foot or so long. I felled a young Douglas fir that had a double top and cut 2 pieces.
Remove the bark with an axe, hatchet or a drawknife.
Mark out the size of your handle on the growth rings, they are a great reference to use and you'll make a round handle! Orient your piece so that the cut end that was closest to the crown of the tree is up when you mark the circumference of the handle. The opposite end cut should be the end that is closest to the butt of the tree. Why? Wood splits better from the crown, or head, to butt.
Put a line all around the piece, this is where you will the shoulder. Usually the length of the mallet's handle is the same as the diameter of the tree, the same for the head. So a piece that is six inches in diameter will have a handle six inches long and the head is also six inches long. The handle can be a little shorter then the head, it balances better in your hand and is easier to swing saving your arm.
Take your saw and start cutting, again using the growth rings as reference. Don't go too deep, you can adjust the thickness of the handle as you work.
Go to your chopping block and start splitting away what doesn't look like a handle. Try not to split any of the mallet head, some axe marks are okay, go ahead and use your axe to carve the handle.
Keep carving with an axe for as far as you are comfortable, then switch to a knife, pocket, sloyd or otherwise to smooth and finish it up. Traditionally, the handle tapers down a little from the end to the head.
Adjust the thickness to what you desire, I make mine so that my middle finger just touches the pad beneath the thumb. I learned that while attending the Horseshoeing School at Montana State University, we had to size the handle on our 2 1/2 pound rounding hammer to fit our hands before we could start shaping horseshoes.
Two finished froe mallets. I made these as close as I could to the originals, I did not change anything! I say that because hand riving shingles is tough, hard work, the men who first made these mallets swung them all day long, they had to work out a form and shape that worked well for them. As I said earlier, these mallets are traditional to one region in northeastern California and didn't come from a book about woodworking in Appalachia. The originals were made from Douglas fir, were considered disposable and were often made on site. Who knows what shingle making tradition originally used them, the lumber industry in California attracted men from all over the United States and the world.
I spent about an hour making these, I could hear the voices of my mom, my dad and Uncle Frank as I worked, they were the ones who showed me how to make these mallets. I loved them all and now they are gone. It was good to make these.
I hope you enjoy making one!
PS
I buried these in snow, I know that they are going to split!
Monday, December 19, 2011
How to Make a Spring Pole Lathe for Bowl Turning, Part 5
I worked hard. Anyone who works as hard as I did can achieve the same results.
J.S. Bach
Work continues on the lathe, yesterday I fashioned the legs for the poppits. In this shot I'm cutting the shoulders for the poppits, they'll sit on the bed of the lathe. By the way, the saw I am using belonged to my grandfather, it's an E.C. Atkins crosscut with a rosewood handle. I've never had it dated, I'm assuming that he got it around 1910 the year he and my grandmother were married. (After that they had a lot of kids and not much money!) It's a wonderful saw.
Now comes the fun part, splitting of the cheeks so I can finish with an axe. The froe is another heirloom made by grandfather from a car spring. I have 2 of his froes, a riving froe and a checking froe. I used the riving froe to split off the cheek, it is a narrow froe, I was told by my uncle that you used a narrow froe to split the shingle off of the bolt. The checking froe is wider and a little heavier, it was made to mark the bolt to see how many shingles you could rive from it, in other words, you used it "to check and see what you could get." Douglas fir is a bit stiffer to split then sugar pine, you can see I'm trying to get my right hand into the split to help it along. The right hand holds the split while you work the froe down the split, usually your hand gets a little squashed in the process. I once tried to teach this skill to some historic preservation workers that I worked with, they thought it was the dumbest thing. "Why, do we need to know that?" they said, "can't we buy the shingles already made?"
Success! The cheek split off more or less how I wanted it. As I said, Douglas fir is tough and stringy and this tree had a twist to it, not the best stuff for splitting. I finished up the cheek faces with an axe. I wanted to include a photo showing me trying to fit the poppit into the slot, by for some reason Blogger would allow me only 4, not 5, photo uploads today.
Both poppits fitted into the bed. Now I need to drill and cut out slots for the wedges that will hold the poppits in place.
It's lightly snowing right now. I have to replace a fingerboard on one of my guitars, the walnut/spruce one and I need to finish french polishing the neck of the cedar/maple guitar. Always, there is too much to be done!
Post Script 12/20/2011
After Steve's comment I decided to add a photo of me using the handle of the mallet to hold open the split while I work the froe down the split. I wasn't able to upload this photo when I wrote the original post. (I know it is a small mallet, it was the only one that I could find at the time, I later remembered that the other mallet was in another tool chest!) Steve is right, your hand can get trapped in a split. It's a habit for me to put my hand in the split, that is what I was taught when I learned how to rive sugar pine shingles. You start the split and open it with the froe driving it down through the bolt with a mallet and then work your fist with the thumb up into the split to hold it open while you continue splitting with the froe. A sugar pine shingle is supposed to be less then 3/16ths of an inch thick, sugar pine splits easily, there's less chance of getting your hand trapped. I learned this skill from 2 uncles, men who could rive over a 1000 shingles day back in the 1930's and 1940's for "a penny a shake". That doesn't mean I shouldn't be aware of safety concerns, thanks for the safety tip, Steve!
Sunday, December 18, 2011
How to Make a Spring Pole Lathe for Bowl Turning, Part 4
The past is never dead. It isn't even past.
William Faulkner
My wife was kind enough to take some photos of me working on the lathe this weekend. I needed to length the slot in the lathe bed, after first cutting it I discovered that I wouldn't have enough room between the centers for a bowl blank and the mandrel. Here I've drawn some reference lines.
Thanks goodness for small chainsaws! Here I am cutting an extra five inches that are needed at each end of the slot.
Now comes my safety message: I hope you can see where my left hand thumb is in this photograph, because you will notice that I have it wrapped firmly around the chainsaw handle. I do this to maintain firm control of the saw. I know a guy who refused to do this, he put the bar of his chainsaw all the way to the femur of his left leg, luckily he didn't die, he walks with a bad limp today. I bring this up because I was looking through Dave Ellsworth's book Ellsworth on Woodturning and there are several photos of him operating a chainsaw and he does not have his left hand thumb wrapped around the chainsaw handle! This is a very dangerous practice! I was on a forest fire at the Black Canyon of the Gunnison back in 1995 swamping for a sawyer who wouldn't hold the chainsaw properly. The crew boss took the saw away from him and handed him a pulaski. He told the sawyer that he wasn't going to have anyone injured on his crew. Chainsaws are dangerous! Treat them with respect!
I cleaned up the slot best I could with a 2 inch wide mortise chisel, I was wishing that I owned a slick.
Our dog Rufus says "Hi!"
Wednesday, December 7, 2011
How to Make a Springpole Lathe for Bowl Turning, Part 3
During the 16th century living standards rose and those who were well-off could afford pewter plates and dishes. Salt-glazed stoneware jugs from Belgium and Germany gradually took over from the wooden bowl as the commonest drinking vessel and English potters started making more earthenware dishes. However, the biggest challenge to woodware came in the late 17th and 18th centuries when cheap glazed pottery, dishes and bowls became available for the first time.
Robin Wood, The Wooden Bowl, 2005
Please visit Robin's blog at
http://greenwood-carving.blogspot.com/
(For those of you who are coming to my blog from Robin Wood's blog, I have updated How to Make a Spring Pole Lathe for Bowl Turning with Parts 4 and 5, so please check out these newer posts. I don't want you to miss a single episode! Wilson)
The lathe bed is upright, I decided to level it with a scrub and jack plane. This is the fourth wooden lathe that I've built and I know the need to have a flat and level bed, if it isn't there will be problems with the poppits. They need to line up correctly to each other or things won't run right.
Here again I cheated, I used my little Stihl chainsaw to cut out the slot for the legs of the poppits. I need to finish truing up the inside of the slot so the poppits will fit properly.
I split the wood for the poppits from another Douglas fir. After I opened that tree up I realized that I should have used it for the bed of the lathe, it was a nice tree with fairly straight grain. These poppit blanks are about 5 inches square and I hewed them with an axe.
Here are the poppits. After I clean up the slot, I will cut the legs for the poppits and then cut out the slots for the wedges that will hold them in place on the lathe bed.
Right after I took this photos we got several storms that each dumped over a foot of snow and the temperatures dropped below 0 degrees F. Needless to say it's been a little too cold and snowy to do anymore work on the lathe.
The Wonders of French Polish, Part 2
Among the greatest perils that could stalk a guitar, except for being run over by a truck, are the climatic changes from humid to dry and viceversa, especially if these changes are produced rapidly.
Jose Ramirez II, Things About the Guitar, 1990.
Just a quick blog, here is the sitka spruce/black walnut from an earlier post. I leveled sanded the entire guitar after several "bodying" sessions with shellac, I sanded with 800 grit wet/dry sandpaper and used olive oil for a lubricant. I understand that this "satin" look is very popular on guitars today.
Here is the guitar after 15 minutes of french polishing, quite a difference isn't it.
Last night I was re-reading Things About the Guitar, by Jose Ramirez II, he didn't think that shellac was a suitable finish for a guitar. From what I read in the American Luthier magazine, many Spanish makers today send out their guitars to be finished with catalyzed urethane, which I understand is highly toxic to apply. Apparently you have to be suited up with a self contained breathing apparatus when you enter the spray both! Wow! You have to watch the beautiful video
of the workshop at Ramirez guitars, http://www.guitarrasramirez.com/video.html
I'm getting better at this technique called french polishing and I enjoy it far more then trying to brush on some other varnish, I just wish I had tried it sooner!
Saturday, December 3, 2011
How to Make a Spring Pole Lathe for Bowl Turning, Part 2
Appreciation for skills and the interpretation of the elements of design expression, inspires understanding and the desire to acquire these essentials of good craftsmanship. Let us seek opportunities to share and to exchange skills with others, especially craftsmen of other races and countries.
Lester Griswold, Handicraft, 1931
I leveled the bed of the lathe as well as I could with an axe, then flipped it over and started to drill the holes for the legs. The largest twist bit that I own is only 1 1/4 inches, so I dug out an 1 1/2 hole hog bit from my days in construction. It fit the brace nicely and the jaws held on to it, it was a bit of work to bore these holes, the bit didn't want to clear the chips that well and my shoulder joints were screaming at the end of each hole. The bit worked and made a nice clean hole. I drilled the holes about 4 inches+- deep, I drilled until the bit was buried in the log and the brace's nose was hitting the bark.
The legs I split out of the rest of the tree and roughly shaped with an axe. I have no idea what length I cut them to I was doing everything by eye. One of the rules in making this lathe is not to measure anything, except maybe with my out stretched arms, or my fingers or my hand. In this photo you can see that I am rounded the tenon with my little double bit cruising axe. You make the tenon square, cut off those corners to make an octagon and then continue cutting the facets until it is round.
Four holes drilled, here again, I used my eye to adjust the angle of splay using the bit and brace for the visual reference. I drove the first leg home with a sledge hammer, then used that as a reference for the next leg hole and so on for the others. You hammer the legs with the sledge until the leg stops ringing, that means you've driven it as far as you can. You'll be surprised at how sturdy these legs are.
Four legs made, tenons cut and driven home. If this lathe doesn't work out, I'll cut the legs down to have nice bench.
Subscribe to:
Posts (Atom)
1912 Ex-Segovia Cedar/East Indian Rosewood Classical Guitar
Inspired by Andrés Segovia’s famous 1912 Manuel Ramirez guitar, I chose Western red cedar top and East Indian rosewood back and sides from m...

-
I will cite the case of a marvelous concert player, a Japanese lady who is barely 5 ft. tall and with hands that are real miniatures. She pl...
-
What holds the Holy of the Holies, what did Brahma become? Wood. Why will aspen always tremble? For the nails driven into the cross. What ma...
-
Everything should be made as simple as possible, but not simpler. Albert Einstein, scientist, mathematician This morning I spent sever...