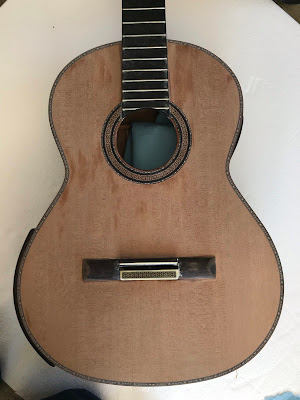
Replacing a Classical Guitar Top, Part One
Few realize the influence of the luthier on the life and career of the artist.
Andres Segovia, In Memoriam of Hermann Hauser, The Guitar Review, 1954
Recently, a classical guitar made by a well known, highly respected Spanish maker came into the shop for evaluation. The current owner had removed all the original lacquer finish from the top and sanded so much that areas of the top were less than 1mm thick. The first day it was in the shop I spent over an hour scrubbing the top to remove remaining finish remover and other chemical crud that was leftover by “a home repair”.
These two photos so how much wood was removed by sanding to remove the original finish...
I called the owner with what I discovered and we both concluded that the guitar deserved a new top. The owner stopped by the shop later that week, he selected a nice redwood top and a new rosette.
The biggest challenge with this guitar is the original binding had to remain to preserve of the guitar’s integrity. My typical procedure is to rout off the binding, cut off the top, replace top and re-bind with in-kind wood binding. After some research for different techniques I found a short photo essay on top removal by John Greven and a video by Fritz Damler, both master luthiers. I am very grateful that they shared their knowledge and techniques!
The original top with bracing.
I didn't try to match the original bracing, this bracing has worked well for me on other guitars that I made.
The new top fits like a glove...
The new top glued on an ready for purfling.
Everything worked!
Close up of the original binding and new purfling. I am quite happy with the result!
To conclude Part One, I present some photos on how I glued the fret board extension back onto the top.
Again, my thanks to master luthiers John Greven and Fritz Damler for sharing information on their top removal techniques!
In Part Two, I will cover installing the bridge and maybe a few other things!


Comments
Post a Comment